Eleaf iStick PICO 21700 Kit Review
The original iStick PICO 75W came out a couple of years ago, but it remains one of the most popular single-battery mods on the market. Two years is a long time in this industry, and the PICO 75W had been starting to show its age for a while now, so Eleaf decided to breath new life into its successful series by releasing an updated version, with support for larger diameter atomizers, improved battery life and full-fledged menu. So if you loved the old iStick PICO as much as I did, you may want to check out the new Eleaf iStick PICO 21700.
A Look at the Contents
The iStick PICO 21700 comes in the usual Eleaf packaging, a white-and-green rectangular cardboard box, with a picture of the assembled mod and included Ello tank on the front, and a list of contents and company information on the back.

Inside the box, we have the mod placed in a Styrofoam holder, next to the Ello tank and a spare glass tube. Underneath the Styrofoam holder is another compartment containing a micro-USB cable for charging and firmware upgrades, a bag of spare o-rings for the tank, an 810 Delrin drip tip, an adapter for 18650 batteries, a chimney extension for the longer glass tube, a spare coil-head and a user-manual.
This is pretty much your standard advanced starter kit. I’m always glad to see a spare glass tube included, especially one that increases e-liquid capacity from 2ml to 4ml.

Design and Build Quality
There is really no point going into too much detail about the design of the iStick PICO 21700, because it is virtually identical to that of the PICO 75W. The only real difference is that the newer version is a few mm taller and wider, in order to accommodate 21700 batteries. So it’s pretty much a slightly larger version of the original iStick PICO.
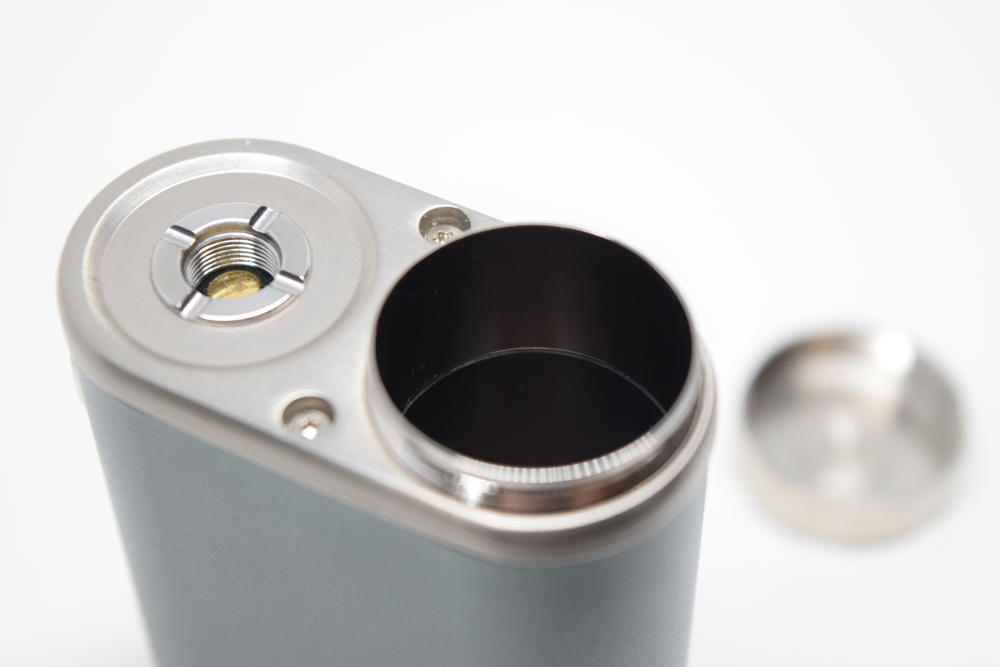
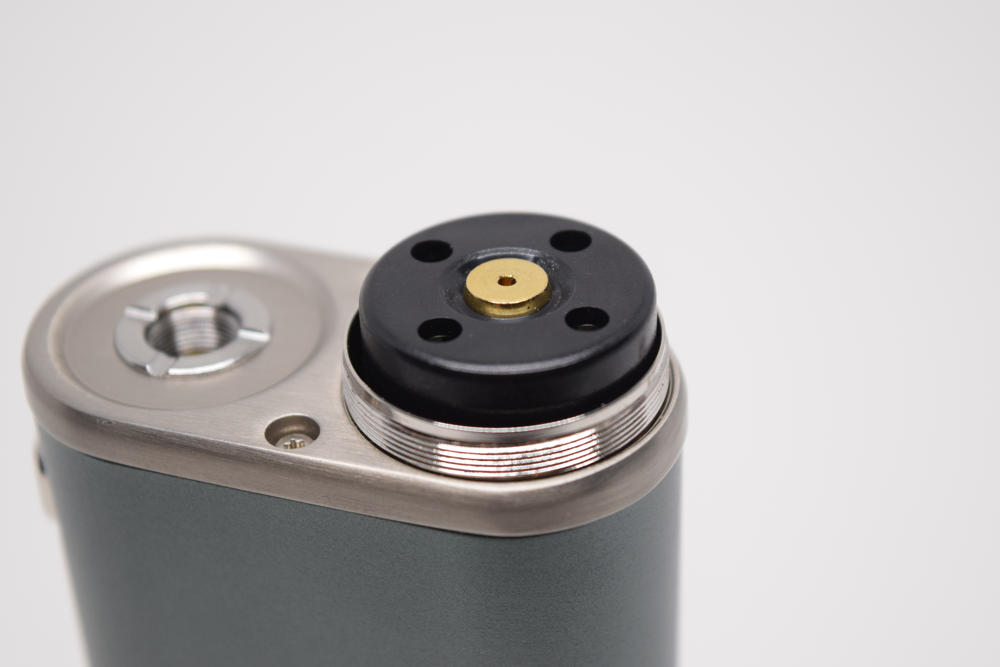
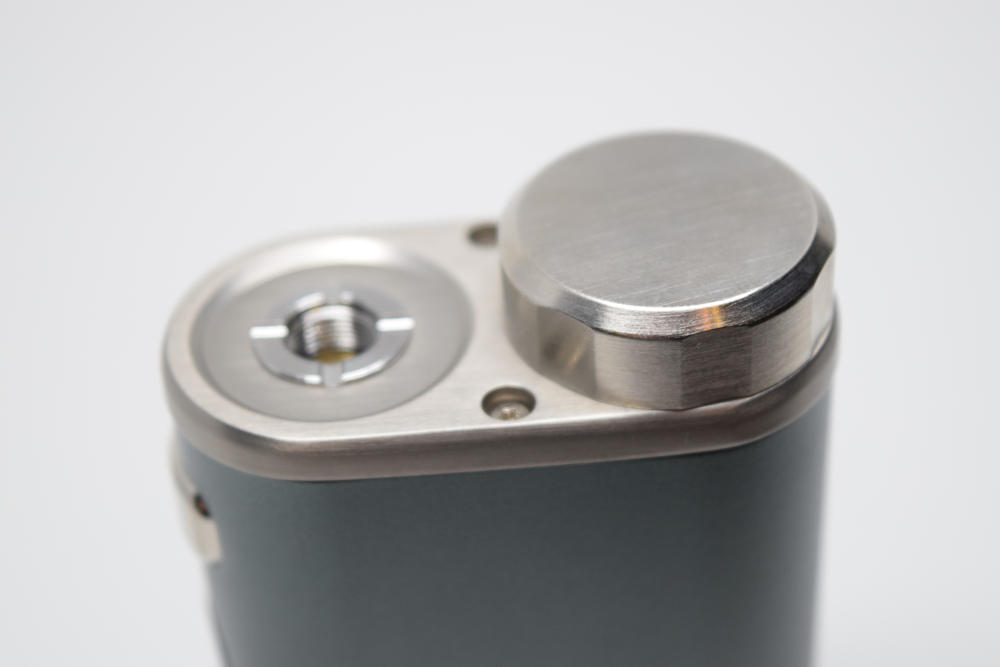
The aluminum casing of the mod has the same rounded edges and corners that made the first version of the device so comfortable to hold in the hand, the signature battery cap next to the 510 connection is just a bit larger this time around, but screws on just as smoothly as the original, and the connection itself features a gold-plated, spring-loaded pin, and, most imprortantly, it can accommodate atomizers up to 25 mm in diameter.
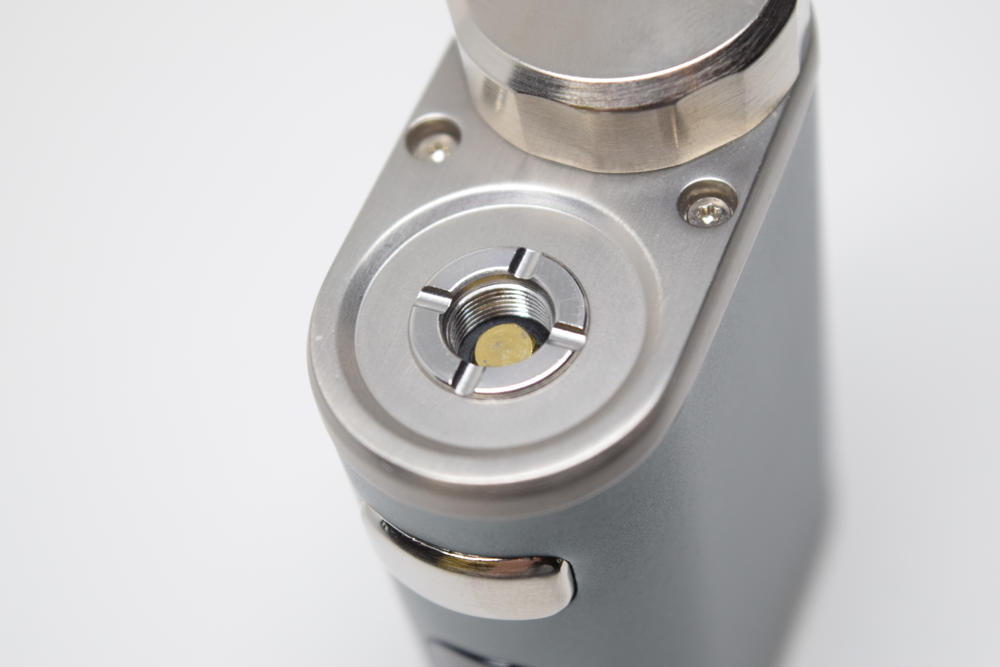
This was one of the areas that the old PICO suffered in the most. Because of the protruding battery caps so close to the connection, you could only use 22mm tanks and RDAs with it. There aren’t too many of those anymore, but luckily, the new PICO 21700 fits atomizers up to 25mm with no overhang. The Ello tank included in this kit actually measures 24.5 mm, but I’ve tried some 25mm attys just to be sure, and I can confirm that they fit just fine.
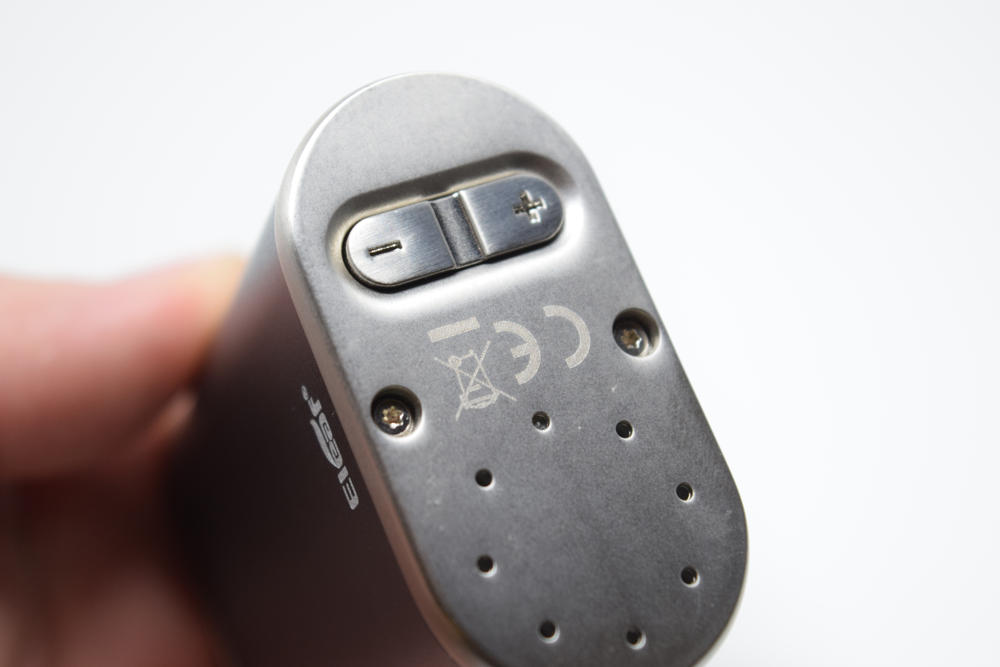
The ‘+’ and ‘-‘ buttons are located on the bottom of the device, but as long as you place the device on a flat surface, you really don’t need to worry about them accidentally being pressed. The metallic fire button has the same curved shape and protrudes from the mod just enough to be easily pressed. When it comes to metallic buttons, I’m always a bit worried about annoying rattling, but the fire button on my PICO 21700 is very solid.
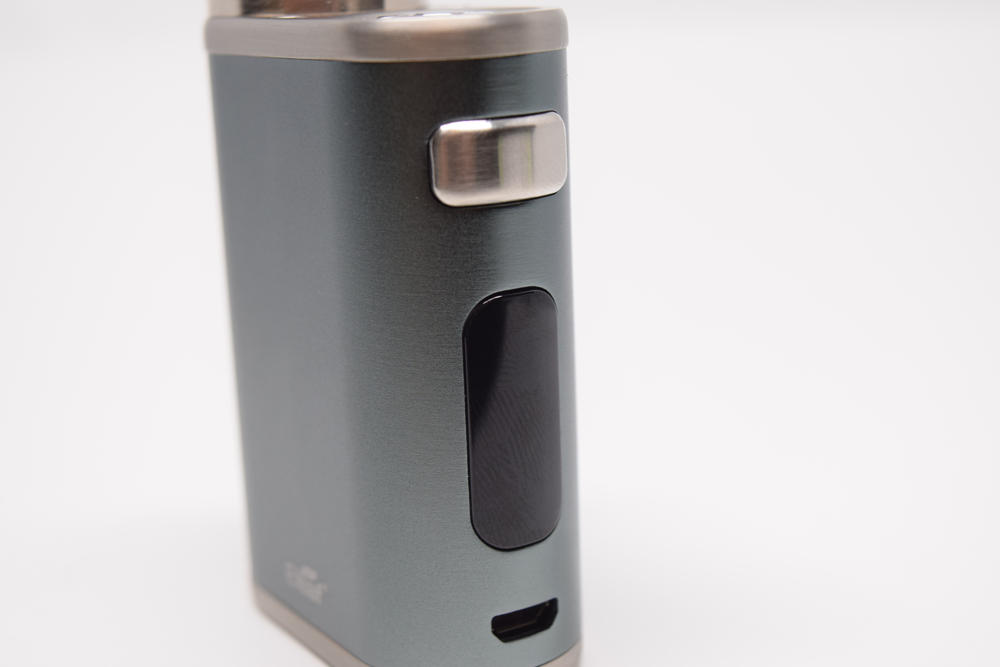
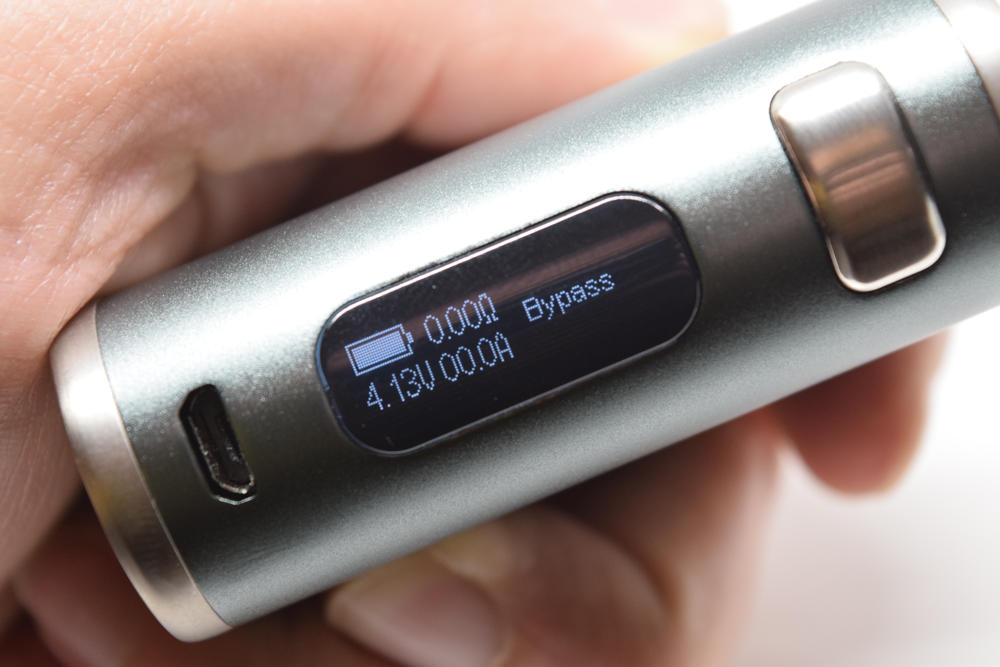
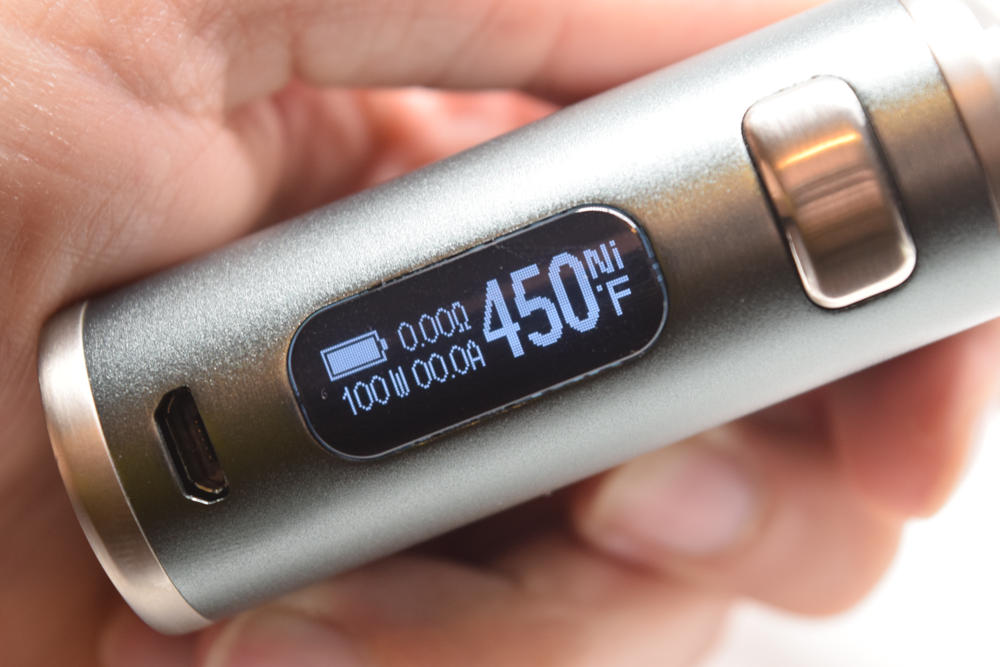
We’ve seen some really cool colored displays lately, like that of the Smoant Cylon or Joyetech Espion, but Eleaf apparently didn’t think it necessary to make that type of upgrade just yet, so the iSick PICO 21700 comes with an unimpressive black-and-white screen, very similar to that of the original PICO. It’s a bit larger this time around, if it’s any consolation, but other than that, it’s kind of mediocre.
That’s pretty much all there is to say about the design of the new Eleaf iStick PICO 21700. It’s just a slightly larger version of the original, so if you liked that one, you’re probably going to like this one as well.

Menu System and Navigation
The istick PICO 75W did have a proper menu system where you could select between wattage mode, temp. control and TCR, but all the other settings (i.e. configuring the three Memory Modes, toggling stealth mode, etc.) were accessible through a series of button combinations. Eleaf decided to make adjusting secondary setting a little easier this time by adding a secondary menu where you can play with all the available settings.
To toggle between wattage mode, temp. control for the three supported materials (stainless steel, titanium and nickel) and the the three memory modes, all you have to press the fire button three times rapidly, while the device is turned on. You’ll notice the change to a different mode on screen, every time you press the fire button three times.
To access the secondary menu I mentioned, you just have to keep the ‘+’ button and the fire button pressed simultaniously for a couple of seconds. You’ll then see a few small icons show up on screen. You can toggle between them with the ‘+’ and ‘-‘ buttons and make your selection with the fire button.
In the secondary menu, you can lock the resistance of your coil, activate and deactivate stealth mode, choose what sub-parameter to have displayed on the screen (puff counter, puff timer or amperage), choose from three preheat options and their respective duration, set the TCR for each of the three Memory Modes, check the voltage of your battery, check the hardware and firmware versions, and choose to display a logo on screen when the device is turned on. You’ll have to upload a small logo via PC for the last option to work, though.
There are other features that can only be accessed through button presses. For example, pressing the fire button 10 times in rapid succession while the device is powered off will display the PCB temperature on screen. To adjust the wattage output in temperature control of one of the memory modes, you have to press the fire button four times in rapid succession.
All in all, though, the new PICO 21700 menu and navigation systems are more user-friendly than those on the PICO 75W. It’s not the best menu I’ve ever seen, and I would have liked to see a curves mode added as well, but there is definitely some improvement, so I’m giving it a thumbs up.
Battery Life and Overall Performance
Another area where the iStick PICO 75W was beginning to show its age was battery life. It was a single 18650 device, so you really had to keep a spare battery on you at all times, especially if you used it with low-resistance coil builds. The new PICO 21700 will keep you vaping for longer, thanks to its compatibility with 21700 batteries. It’s still a single-battery device, but these larger batteries do offer considerably more battery life.
Officially, the PICO 21700 is compatible with 21700 batteries and 18650 batteries, thanks to a small plastic adapter included in the kit. However, I can tell you that it also works with 20700 batteries, if you have any of those in you collection. The only problem with the latter is that they rattle a bit inside the battery compartment because they have a smaller diameter than 21700 batteries.
The iStick PICO 21700 features “fast-charging” technology, which means you can charge your battery inside the device at a 2A charging rate. The old PICO only had 1A charging. However, I always recommend you use external chargers. They are the safest option.
The new PICO can also be used while charging, in case you plan on using it as a passthrough.
![]()
I’ve been using the iStick PICO 21700 for just over a week now, and so far, I’ve experienced no performance issues whatsoever. I noticed that it fires considerably faster than its predecessor, which, considering how fast most advanced mods are nowadays, was a must, and that the power output feels very accurate. I don’t have the tools or the know-how to properly test the output, but as someone who’s tried hundreds of devices over the years, I can tell you that it hits just as strong as other modern mods I’ve reviewed recently.
I normally don’t spend a lot of time testing mods in temperature control mode, simply because I’ve never been a fan o this feature. However, I did have a have a dual-coil stainless steel build on my Medusa Reborn RDTA, so I decided to try it on the new PICO. It took me a while to find the sweet spot, but after messing with the temperature and the wattage, I actually got a decent vape out of it. The mod does a good job of protecting the wick when you hit the set temperature threshold, and I for one didn’t notice that wavy output pattern older temp control mods were known for.
TCR was way over my head, so no, I didn’t mess with it. And, unless you really know what you’re doing, I don’t recommend messing with the temperature coefficient settings either. This is a really advanced feature for knowledgeble users who want to fine-tune their vaping experience to the extreme.
Overall, performance is good, the mod does what it’s supposed to, nothing more, nothing less.
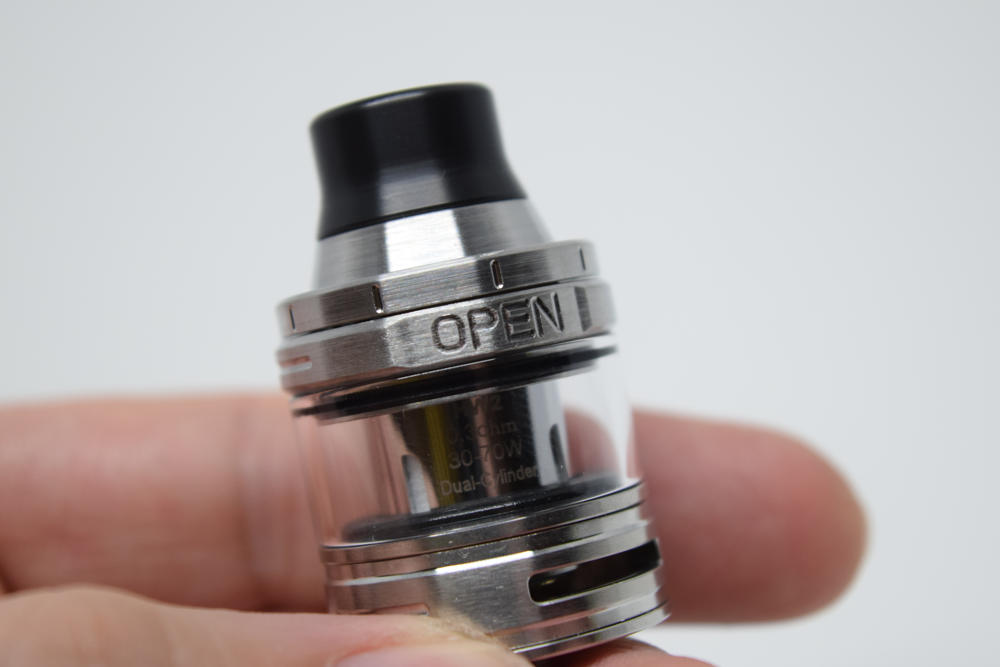
The Tank
I remember being very impressed with the old Melo 3 tank that came with the original Eleaf iStick PICO 75W, so I kind of anticipating the Ello to be a great tank as well. Historically, the PICO kit has been very popular with beginners and intermediate users, most of which actually use the included tank, so it’s important for it to deliver a satisfying vaping experience. I(n that respect, the Ello does not disappoint.
The products used for this review were provided by Vape Sourcing. They currently have the Eleaf iStick PICO 21700 Kit available for just $50.00
Pros
- good build quality
- compact and ergonomic
- 20700 and 21700 battery compatibility
- improved menu system
- quality Ello tank
Cons
- outdated display
- outdated design


been using my pico 21700 for a week now and I love it.Start with lower wattage or you can burn out a coil in your cartridge. I found out the hard way