Vandy Vape Kylin M AIO Review
What started out as a humble atomizer has now turned into one of Vandy Vape’s most popular product lines. The Kylin brand is usually associated with sub-ohm atomizers, but it has now transcended into the all-in-one (AIO) market as well. The new Vandy Vape Kylin M AIO is actually a 3-in-1 kind of device, allowing users to use coil-heads, pre-made coils or mesh strips, which makes it one of the most interesting vaping devices of 2020.
Kylin M AIO Specifications
- Dimensions: 101 mm x 46.5 mm x 24.5 mm
- Material: Zinc alloy
- Battery: Single 18650
- Wattage range: 5-70W
- Voltage range: 0.5-5.5V
- Vaping Modes: Variable Wattage, Temp. Control (TCR), Variable Voltage
- Resistance range: 0.05Ω – 3.0Ω
- E-liquid capacity: 5 ml/2.5 ml
Kylin M AIO Packaging and Presentation
The new Vandy Vape Kylin M AIO comes in a large square box, with a picture of the device and a large nicotine warning on the front, and some more warning, a list of its main features, a list of contents, and manufacturer information, on the back. Those nicotine warnings only appear on units sold on the EU market, so if you’re from the US, your box should be nice and clean.
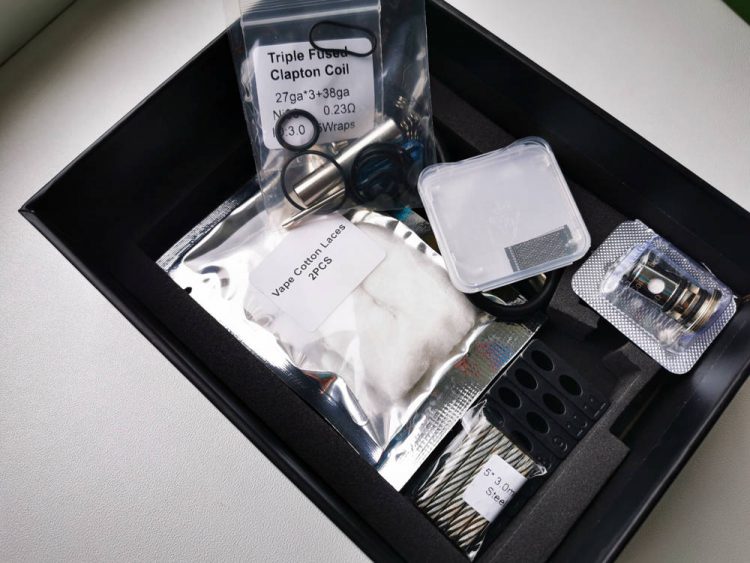
I am not exaggerating one bit when I say that the Kylin M AIO is by far the most generous one I have reviewed in a very long time. Apart from the device itself, it comes with so many included accessories that I just had to take a picture of the box just to prove that I am not trying to hype up this kit.
The Kylin M AIO package includes a second refillable pod, a plastic tool for coil testing, another tool for measuring the leads of your coil, four different mesh strips, a pre-made fused Clapton coil, an extra M coil-head (another comes pre-installed), cotton strips, five steel-rope rods, a box of accessories for the build-deck, including spare o-rings, spare screws and springs for the deck, and a metallic rod for bending the mesh strips, a USB Type-C charging cable, and some informational cards.
There is a lot inside this kit, and it might be a bit overwhelming for beginners and casual users. Just keep that in mind if you are planning on buying the Kylin M AIO.
Kylin M AIO Design and Build Quality
The Kylin M AIO has already been available for about six months now, but even though I wasn’t able to get my hands on it when it first came out, I still wanted to try it out. So when the people at New Vaping asked me if I wanted to review it, I didn’t have to think about it at all. And a lot of that had to do with how slick this device looks.
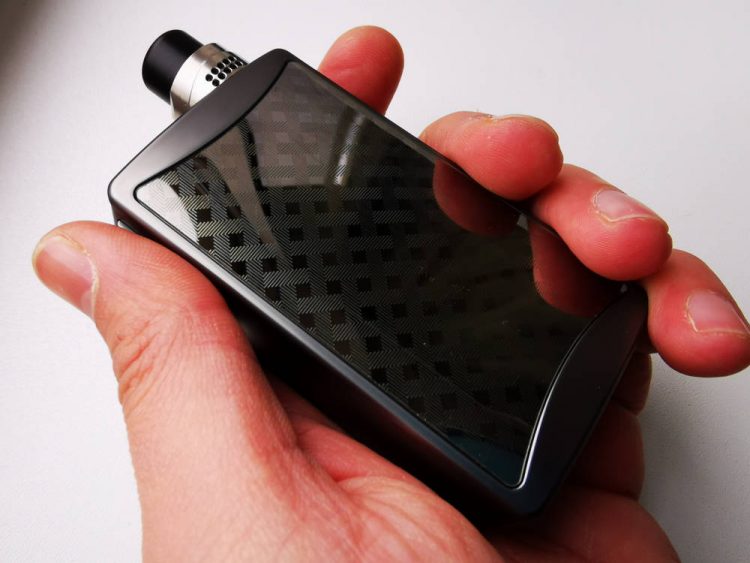
Not only is the Kylin M AIO one of the most ingenious vaping devices I’ve tested recently, it’s also one of the best looking. It has a minimalistic box mod look that reminds me a lot of the Joyetech eGrip 2, one of the nicest AIO mods I’ve ever tried, and the same sturdy and weighty metallic body. It is relatively heavy for a device this size, but it’s that weight that gives it a high-quality feel in the hand.
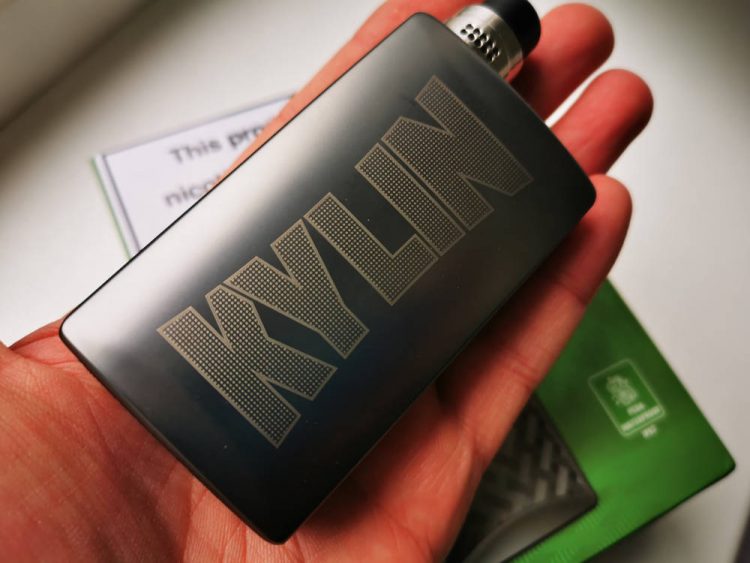
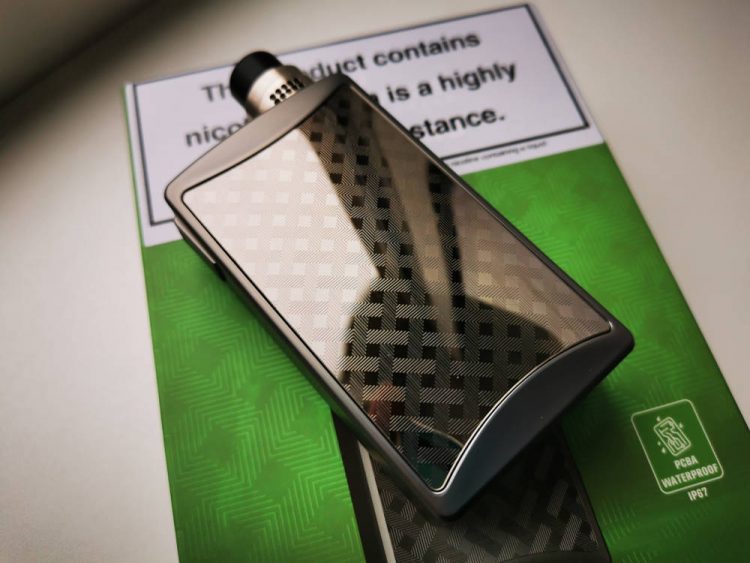
Apart from a very discrete fire button on one of its narrow sides, and a small cutout for checking the e-liquid level on the opposite side, the Kylin M AIO is just a block of brushed metal with a large KYLIN logo on one panel, and a very glossy pattern, on the other. That in-you-face logo may put some people off, but it reminds me of the VooPoo Drag, one of my favorite vape mods ever, so I have no issue with it. That glossy panel, which also acts as a magnetic battery door, on the other hand, looks super nice, but is prone to scratching, so I don’t know how it will hold up in the long run. For the time being, the Kylin M AIO is one sweet-looking mod.
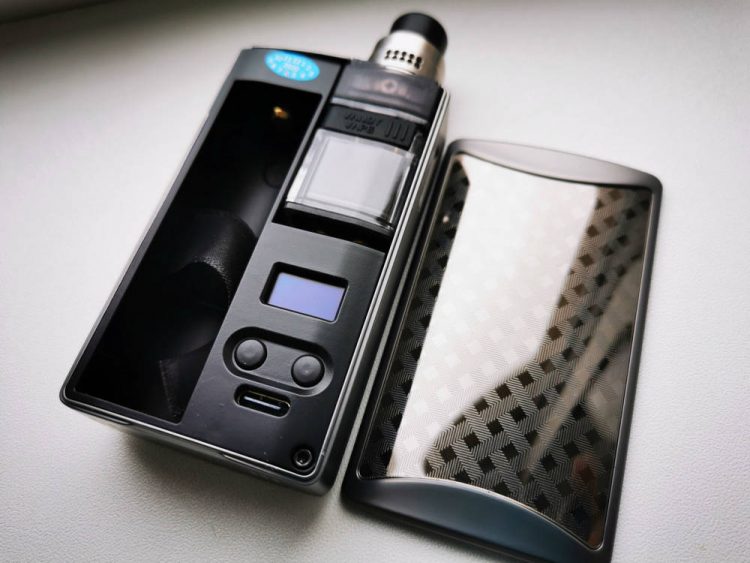
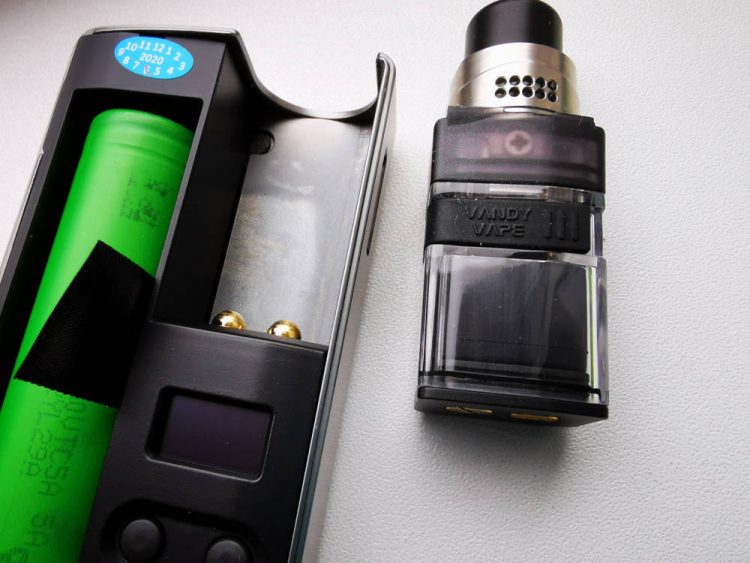
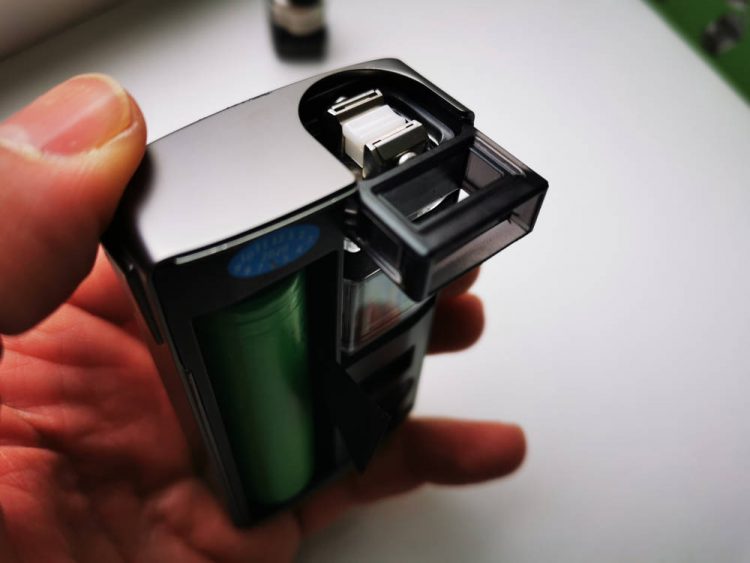
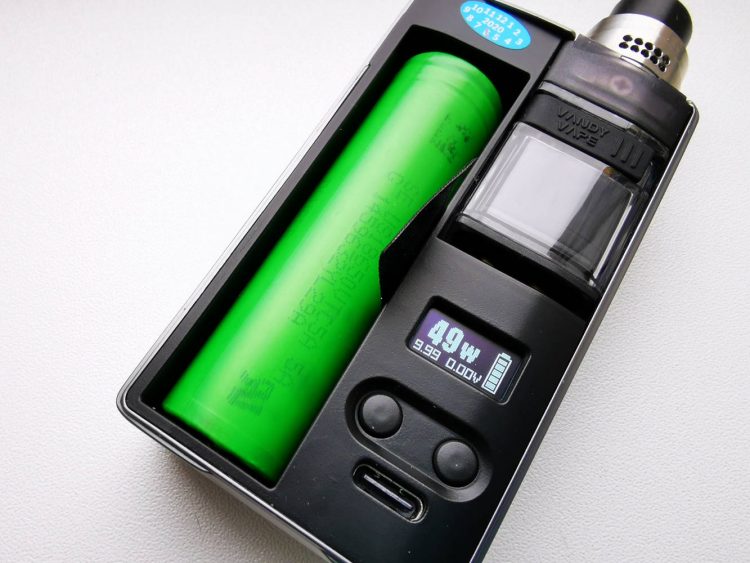
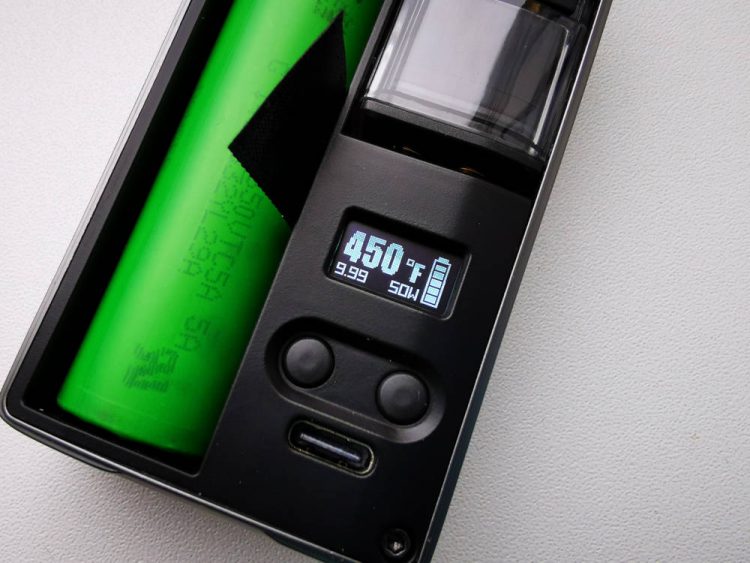
Popping open the battery door of the Kylin M AIO, you’ll find the slot for an 18650 battery, next to a refillable RBA pod/tank and a small control panel made up of a tiny display and two adjustment buttons. We’ve seen this type of layout before, most recently on the VapeOnly Space pod mod, and I personally am a big fan, because it keeps the exterior very clean.
The battery slot comes with a strip of fabric design to make removing the battery easier, and has large polarity indicators etched into it. The display of the Kylin M AIO may be on the small size, but it is very bright and features all the information you really need (power output, coil resistance and battery level). The buttons are on the small side and a bit recessed, so someone with big fingers may have some trouble with them, and the USB Type-C port located right under the buttons means you will have to take the battery door off every time you want to charge the battery.
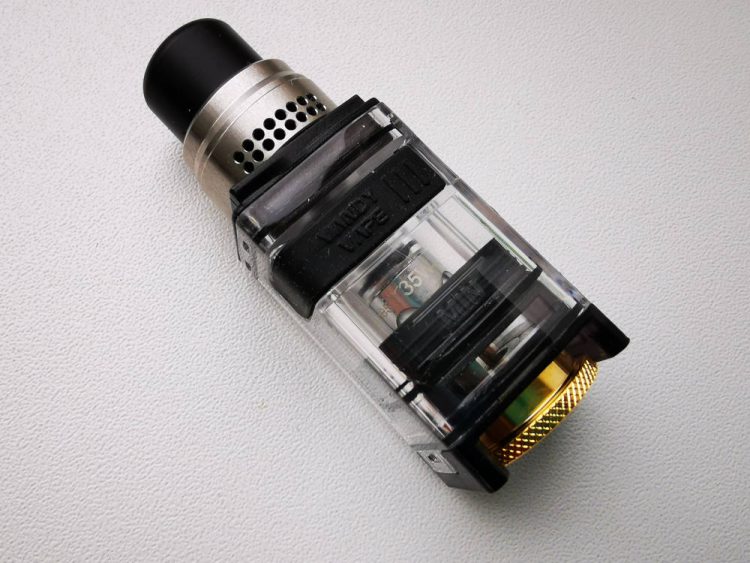
The Kylin M AIO comes with two different plastic pods/tanks – a DIY pod similar to an RDTA, which takes both round wire coils and mesh strips, and a standard pod which works with Vandy Vape M coil-heads. The two pods both come with their own metal top caps, which are NOT interchangeable. So if you want to use the top cap on the DIY pod on the coil-head pod, it’s not going to fit.
Kylin M AIO Standard Pod
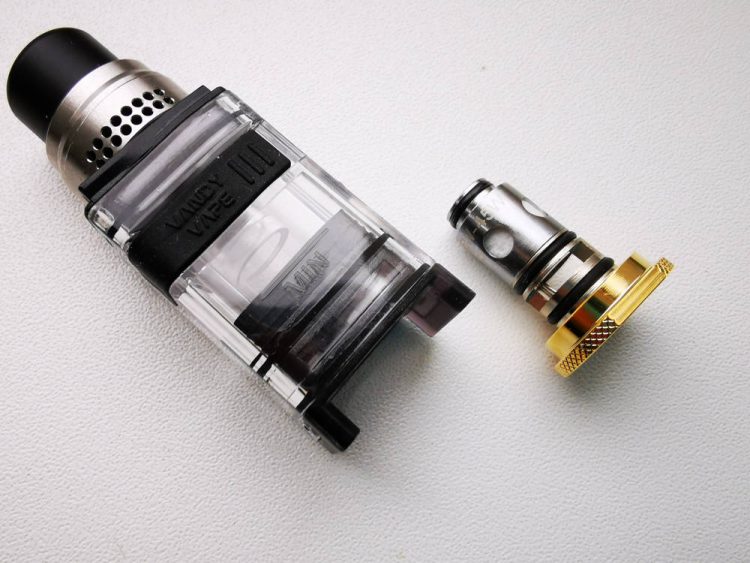
The two Kylin M AIO pods have a very similar design at first glance, but they are in fact very different. The standard pod is much simpler to use. It takes mesh coil-heads that are easily inserted through the bottom, and is designed at more casual users who aren’t familiar with coil building and installation, or just don’t want to get their hands dirty.
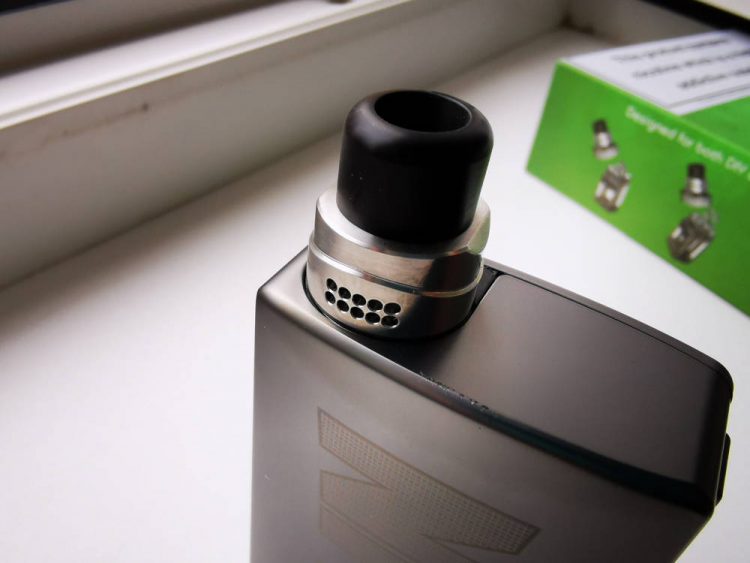
The standard pod features a top airflow system, which can be adjusted by rotating the metallic top cap to expose as many honeycomb holes as they see fit. The problem is that it’s kind of hard to see how many slots are open, so you just have to draw on it to check. It’s not a big deal though. What is kind of a big deal is the reduced e-liquid capacity compared to the DIY pod (2.5ml vs 5ml).
Even though the pod has top airflow, it actually has two inner channels that lead the air down to the bottom, and into the coil-head. That translates into less space for the e-liquid, which means you will have to fill it more often. Again, it’s not a deal-breaker, just something you should keep in mind.
Kylin M AIO DIY Pod
Although the standard pod is a lot more user-friendly, the DIY pod is definitely the highlight of this kit. It may be a bit too much to handle for the average vaper, so if that’s you, take my advice and watch a YouTube tutorial on how to set it up. MikeVapes does a great job in his video review.
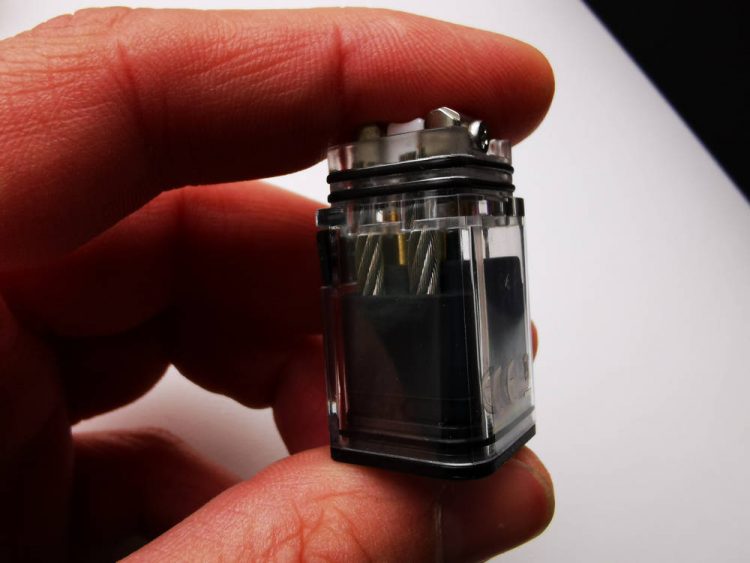
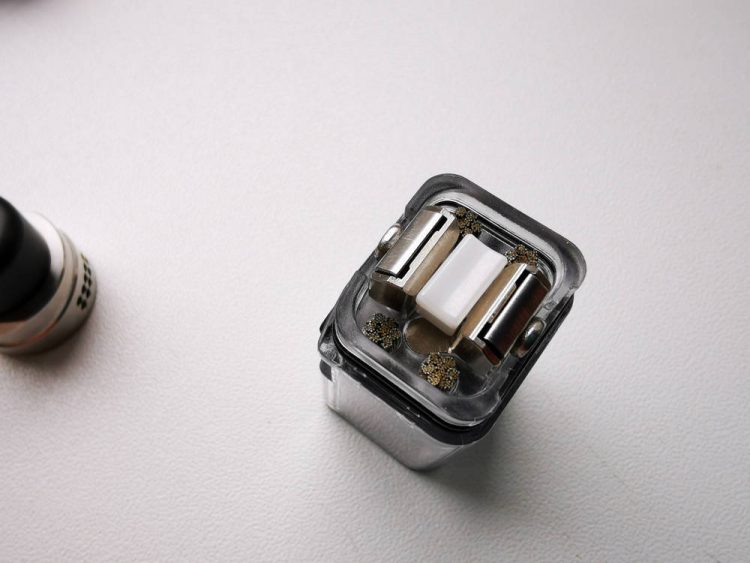
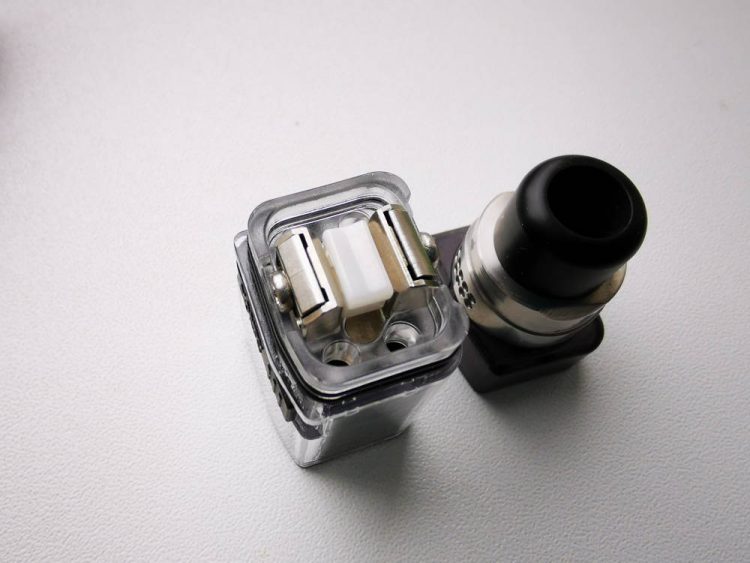
The DIY pod of the Vandy Vape Kylin M AIO is very similar to an RDTA, or a build-deck positioned over an e-liquid reservoir. It has the same type of top cap as the standard pod, only with less honeycomb air slots, but larger. The top cap is removable, it you want to check the coil inside, but to access the build-deck, you will have to remove the top of the pod entirely. Luckily it is colored differently than the rest of the pod, and you can see two black o-rings through the grey frosted plastic.
The Kylin M AIO has the same style of build deck we saw on the Kylin M RTA, a while back, two spring-loaded clamps on opposite sides, and a spring-loaded ceramic block in the center. Basically, all you have to do is loosen those clamps, put your round wire coil leads or a mesh strip in them, tighten the screws, add some cotton, and you’re good to go…
Actually, it’s a bit more complicated than that. Installing the mesh strip requires you to use the included metal rod I mentioned at the beginning of this review, and you need to learn how to wick properly for both types of coils (round wire and mesh) especially since this pod features a metal rope e-liquid wicking system. We saw this on the Wotofo Profile RDTA a few months ago, and I wasn’t too sold on it then. Not much has changed in that regard.
It’s not that the metal ropes don’t work, I just like the old cotton wicking system better. Basically, have these metallic ropes that you insert through four slots under the build-deck. They are supposed to lead the e-liquid upwards, to your cotton, via capillary action. Metal wicking e-liquid sounds weird, I know, but it works. As long as you make sure that your cotton wick is positioned over the top ends of these ropes, you shouldn’t experience any wicking issues.
What I don’t like about the metallic rope system is how hard they are to insert and remove. The pod holes are very tight, so you have to wiggle the metal strips into them, which sometimes causes the ropes to come undone. If that happens, you just need to get another rope, and even though an extra one is included in the kit, you’ll probably need to buy new ones in the long run.
Removing the ropes for cleaning is no walk in the park either. You can try to take them out through the same holes you inserted them into the pod, but Vandy Vape recommends that you remove the two screw on the bottom of the pod, take off the bottom, and take the ropes out that way. That’s overcomplicating things, in my opinion, not to mention cleaning the rods while making sure they don’t come undone is tricky as well.
Setting Up the Kylin M AIO DIY Pod
Installing either the fused Clapton coil or a mesh strip on the Kylin M AIO build-deck is a fairly straightforward affair, if you know what you are doing. Vandy Vape includes every tool necessary – even a lead measuring tool and a metal rod for bending the mesh strip – so all you need is patience and a bit of experience.
One thing you do want to ensure when installing a coil is that you don’t have any hot spots. Because the top cap is so short, your mouth is very close to the build-deck, so if any droplets of hot e-liquid shoot out of a hot spot, they’ll almost surely hit your tongue, and we all know how nasty that is.
Also, make sure the cotton makes good contact with the metallic ropes, otherwise the e-liquid will not reach the coil and you will experience muted flavor, or even a dry burn. Alternating the sides you are tilting the device towards can help with that as well, because most users only tilt it to one side, which means one of your wicks is constantly less saturated than the other.
Finally, never leave the Kylin M AIO on its side, as that will almost certainly cause it to leak, and you don’t want that, even though Vandy Vape claims the PCB is waterproof.
Kylin M AIO Menu System And Navigation
Even though the Vandy Vape Kylin M AIO features a very small control panel, it’s actually a lot more complex than it looks. You actually have multiple vape modes and even a couple of settings to mess with.
Pressing the fire button three times in rapid succession will take you into mode selection. The current power output will start to blink, and you can use the + and – buttons to cycle through the three different modes (variable wattage, variable voltage, and temperature control). Press the fire button to confirm your choice.
Pressing the fire button and the – button lets you flip the orientation of the screen, although that function doesn’t really make any sense, unless you hold the mod upside down. Pressing the fire button and the + button locks all the buttons of the device.
To access the menu, you have to keep both the – and + buttons pressed. Here you can reset the puff counter, choose whether stats are displayed when the fire button is pressed, check the firmware version and input TCR values for temperature control.
That stats feature I mentioned basically displays a puff counter and a puff times while the fire button is pressed, which doesn’t make any sense to me, unless you plan on vaping with the battery door off. Anyways, it’s a feature…
Kylin M AIO Battery Life and Performance
The Kylin M AIO is powered by a 18650 battery (not included in the kit), and features USB Type-C fast charging. I never recommend charging your battery inside a vape mod, but if you’re going to do it anyway, know that this particular device will charge your battery than the older micro-USB mods.
Because this vaping device is powered by an external battery and has variable power output, accurately estimating the battery life is virtually impossible. It depends on the capacity of your specific battery, the power output you have set on the mod, and how much you vape.
Personally, I’ve been using the standard Kylin M AIO pod with the M coil-head, at 40W, with a Sony VTC5A, and I’ve been getting 6-7 hours of vaping on a full charge. Your ‘mileage’ may vary, though.
In terms of performance, I think the Kylin M AIO is about as good as a 3-in-1 device can be. I am not a huge fan of DIY mesh coils, but if that’s your thing, I think you will find the Kylin M AIO works pretty well, providing both ample vapor and excellent flavor. I enjoyed the triple fused Clapton a lot more, though, as I got the same intense flavor out of it, but also hotter vapor, which I personally prefer.
Obviously, you can use the Kylin M AIO with other coils and mesh strips than the ones included in the kit, so your experience may be different, but speaking strictly about the contents of this package, I would definitely recommend the Kylin M AIO kit.
The included coil-heads may not look as impressive as the P Series coils that come with the GeekVape Aegis Boost Pro pod mod, for example, but they work well enough for pre-made mesh coil-heads. They are a lot easier to use than the DIY coils, and provide decent vapor production and above average flavor, for a lot less hassle.
Conclusion
The Vandy Vape Kylin M AIO is one of the most ambitious projects I’ve ever seen. Not only does it have a sleek, stylish look, but it offers three different types of vaping – mesh coil-head, round wire coil, and mesh strip – which I personally have never seen before. We’ve seen pod mods like the OXVA Velocity offer DIY accessories as separate purchases, but the Kylin M AIO makes DIY vaping available right out of the box. I really can’t say how impressed I was with the contents of the Kylin M AIO kit, it really does include everything you could ever need, and more. Hopefully, others manufacturers take notice, although I doubt any of them will.
If you’re looking for something that is extremely versatile, has a high-quality look and feel, and offers above average performance, you really can’t go wrong with the Kylin M AIO. Despite its few shortcomings, it is an excellent product!
The Vandy Vape Kylin M AIO kit was sent to me by New Vaping, for the purpose of this review. They currently have it in stock for £59.99.
Pros
- sleek and compact
- excellent build quality
- unmatched versatility
- generous kit contents
- USB Type-C
- easy to build on
- above average performance in all modes
Cons
- pricey (but worth it)
- steel rod wicking system (subjective)
- low e-liquid capacity (standard pod)


